Are you getting error "Please insert the CD-ROM"? Its OK you can fix it, some people will share cracks and a lot of stuffs to bypass this error, I will never recommend to use EXE crack, such files have virus, malware, rats and more harmful stuffs. So,what is the legit way to fix this issue? First please don't relate it to The House Of The Dead only, It can occur on many other games as well such as Need For Speed II, Contra 1987, Aladdin 1993, Hercules 1997, Zuma Deluxe. I'm just using THOTD game as an example.
How to fix "Please insert the CD-ROM"
This is very simple, all games that are developed in 90's era or must required Direct X. In this modern era still some games are using the old version of Direct X. Download DirectX R and install DirectX (R) Once you did you will no longer receive this error.
An opening port is quite easy if you did everything perfectly. When I was trying to open port or forwarding a port I faced a lot of issues, First finding a good and accurate method on the internet in some cases is not easy, I tried on USB Dongle, I tried on DSL but unfortunately no success.
Sometimes windows firewall don't allow to Open a port, anyway, we will bypass that in this tutorial you have to follow me step by step to get rid of everything and open your port and enjoy.
Image source: openport.io
How to Forward/Open a Port
Step: 1
You need to have a software called Port Forward, click here to download it. Port Forward is trial software which will help us to bypass Windows firewall.
Step: 2
Login to your modem setting area, or modem panel. At my case my modem is PTCL, and panel URI is 192.168.10.1 After login, check your WAN Info and confirm it, which WAN Interface is connected, that assigned an IP to your computer.
Step: 3
Now go to Advanced Setup > NAT > Virtual Servers. Now you have to ADD a Virtual Server, Click on ADD
Step: 4
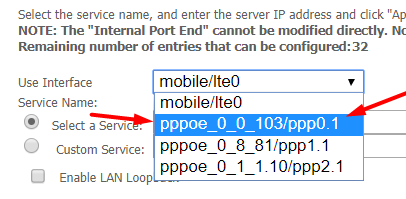
Now choose the WAN Use Interface which was connected in Step 2.
You can Select a Service or you can put a Custom Service name. Keep the following setting.
Custom Service = TestingPort
Status = Enable
External Port Start = 27051
External Port End = 27051
Protocol = TCP/UDP
Internal Port Start = 27051
Internal Port End = 27051
But, wait what about the Server IP Address: ?, We have to find it manually there are 2 ways to find it.
First: Open CMD and type ipconfig and hit ENTER
Under your network connection, IPV4 is your local machine IP address.
Second: Open your Network Properties. And you will find your IPV4 address there as well. I think the second one is more easy and accurate.
Now enter this IP Address into the Server IP Address, and click Apply/Save.
And that's all you did it.
Step: 5
Let's go and verify it. First, you have to verify it using PortForward Software that you download in Step 1.
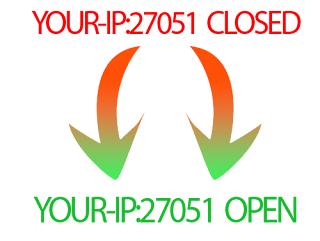
Once you have checked your port using PortForward and you got the result OPEN, its mean your Port is available to the public on the internet, so they can access your port using the public IP address and Port. You can check your port on various sites here I'm checking it with https://portchecker.co
Video Tutorial
If you have any question or facing problem you can simply comment below I try my best to help you out and fix the issue you are facing.
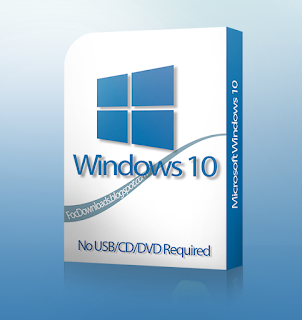
Are you facing trouble with your Windows 10? Want to install renew your Windows 10 but didn't have a USB or CD or DVD? Don't worry you can install your Windows 10, without having a Windows 10 image CD / DVD or USB. You have to follow few simple steps and you did it.
A popup Window will appear select Remove Everything. (I recommend to select Remove Everything)
Step: 6
Everything is perfect, you may need to wait for some time. Removing everything will take time a little bit longer, but trust me that is the best option, If your PC hit by some viruses like trojan, rat, horse or some malware, It will completely clean your PC from that.
Once this is done, you will get to the Windows 10 installation setup after Restart, I hope you will pass the other simple steps of the Windows installation.
And that's all you will get to the Windows Installation. I don't have the other screenshots because of the PC restart after the step-6 and then enter to the boot Windows installation.
Recently, my windows were encountered with an error. I found the fix for that and want to share it with you guys. It's simple, easy and quick FIX.
When you have to full screen any video player or game the taskbar won't hide automatically. I was facing this issue when I open youtube video in fullscreen mode or open any video in VLC the taskbar won't hide.
Screenshots
See taskbar is visible during fullscreen
When it is fixed
How To Fix It
Step 1:
Right-click on the Taskbar and click Task Manager.
Step 2:
Now click Windows Explorer and then click the Restart button which in the bottom of the Task Manager.
And wait for a few seconds, I mean about 20seconds and there you go, everything is ok.
Video Tutorial
Comment below if you have any question regarding this post, or you can appreciate me as well. Thanks
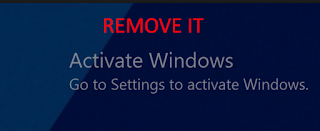
Watermark in windows 10 and windows 8 is somehow irritative. If you don't want to buy just want to remove the mark, then let me show you how to remove Watermark and SmartScreen with one click. So just follow these steps you have did it.
Today I'm sharing you a method that will help you to register Windows for FREE. It will work for all version of windows. Your windows will be registered with the Microsoft officially released Product Key. These are the legit keys. Reference So I don't think so it will cause an issue, I'm sharing you my method.
Product Keys
Home: TX9XD-98N7V-6WMQ6-BX7FG-H8Q99
Home N: 3KHY7-WNT83-DGQKR-F7HPR-844BM
Home Single Language: 7HNRX-D7KGG-3K4RQ-4WPJ4-YTDFH
Home Country Specific: PVMJN-6DFY6-9CCP6-7BKTT-D3WVR
Professional: W269N-WFGWX-YVC9B-4J6C9-T83GX
Professional N: MH37W-N47XK-V7XM9-C7227-GCQG9
Education: NW6C2-QMPVW-D7KKK-3GKT6-VCFB2
Education N: 2WH4N-8QGBV-H22JP-CT43Q-MDWWJ
Enterprise: NPPR9-FWDCX-D2C8J-H872K-2YT43
Enterprise N: DPH2V-TTNVB-4X9Q3-TJR4H-KHJW4
These are the keys, you can copy the key according to your windows edition. At my case, I was using windows 10 Education. So I use NW6C2-QMPVW-D7KKK-3GKT6-VCFB2 But you just need to choose the key which matches your windows edition.
Method
Open CMD as Administrator
Now Type these commands
slmgr /ipk Your_KEY
Replace YOUR_KEY with any of the above keys and Press ENTER.
slmgr /ipk NW6C2-QMPVW-D7KKK-3GKT6-VCFB2
Now enter
slmgr /skms kms8.msguides.com
and press ENTER
Now enter
slmgr /ato
Press ENTER and wait for the response.
Hurrah you did it, you got the registered version you can verify it and enjoy.
Blogger is one of the best platforms for free blogging. With Blogger you can do whatever you want to do, with the passage of time people getting advanced and new templates for blogger are releasing every day, many of them are Free, and some are paid. Which enhanced the use of blogger, sometimes it is very difficult to distinguish a blogger and a website.
XML Error
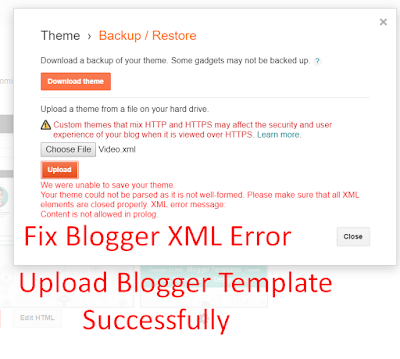
Sometime when you get a new template and want to upload that to your blogger, you may face the following error. And blogger won't let you upload it. There are several reasons for appearing this error. You can use this trick on other error as well such as HTML tag error etc.
"We were unable to save your theme. Your theme could not be parsed as it is not well-formed. Please make sure that all XML elements are closed properly. " "XML error message: Content is not allowed in prolog."
How To Fix
Follow these few steps to fix this issue and upload your template successfully without having any issue with it.
Step 1:
First, you have to go and copy the XML code of your template.
Step 2:
Select all code and then copy the code.
Step 3:
Now, you have to click Theme and then Edit HTML.
Step 4:
Select all code and replace with the copied code, and click Save Theme.
Step 5:
Check the template upload, click Theme, or View Blog.
And that all enjoy this cool trick.
Video Tutorial
Disclaimer
I respect Google and its property Blogger, this trick does not give any loss to blogger. It is just a way that blogger fix the issue in your template automatically.
Today I will show you how to download any playlist from youtube or any other website such as dailymotion, vimeo etc. This is so simple and easy you can do it by just follow my few simple steps. First I want to tell you that we will need a software name Freemake video downloader. You can download it from our website, and register it for free, Click Here to download it.
Follow these steps
Step 1: Copy the URL of your playlist, if you don't know how to copy it see the image below. Don't copy the link from address bar right click on the playlist name and copy the link address.
Step 2: Paste the URL in Freemake video downloader.
Step 3: Now choose the quality, folder and download it.
And that's all you did it, downloading will be starting in a few seconds and you will get the full playlist.
Video Tutorial
If you have any question, or appricaite my work comment below. I'm here to hear you.
Today I'm going to show you how to create a direct download link for you google drive files. This tutorial will help all the users of google drive, especially blogger who wants their visitors and friends to download their files from google drive directly without visiting the google drive page. Follow my these steps to get a direct download link for google drive within seconds.
Instructions
Step 1:
Upload your file(s) to your Google Drive.
Step 2:
Now right click on your uploaded file and get a shareable link.
Step 3:
Now turn on the link sharing and copy the link you got.
Step 4:
Now you have to visit this generator which is our official tool.








![Taskbar is visible when fullscreen - [SOLVED]](https://blogger.googleusercontent.com/img/b/R29vZ2xl/AVvXsEgZajVqSpoh5XBqQNZ5vXlUp_3R26m_Ba3gH9TQCarA8JPbzBYMQyo-JJzcsDzg7VIb8PBdLk32asT4SkeNl92y6RpQLHpTe1d-YDQUyKRVme8wtAg7EXkLLREsUBMjDsDKr5OHfOs_17T_/s320/Taskbar-is-visible-when-video-is-full-screen-thumbnail.png "Taskbar is visible when fullscreen - [SOLVED]")